How to disable Digital signature enforcement in windows.
Today I will tell you about on how to disable Digital signature enforcement in Windows 10, 7 and more.
Just a note if you are disabling the Digital signature enforcement, it will somewhat expose your computer to risk. It's better to go through the driver before installing it.


So, let's begin.
Solution 1:
- Press and hold the SHIFT key and hit the restart button on your computer.
- After that, a blue screen will appear in which you have to go to Troubleshoot>Advanced Option>Startup Settings and after that, just click the Restart button.
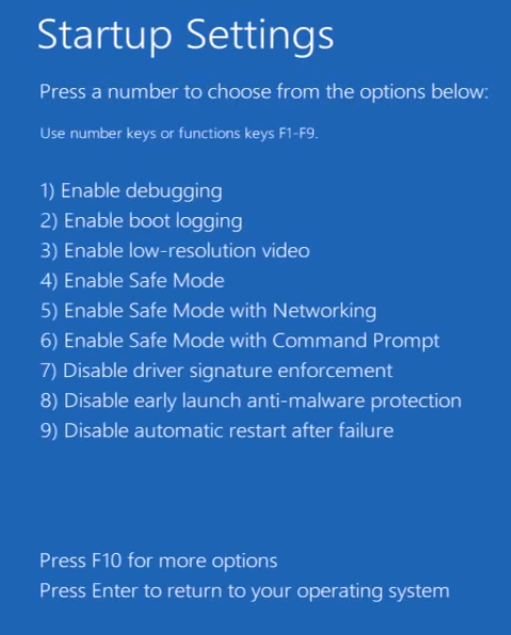
- After your computer restarts, you will set a list of options in which you can Disable digital signature enforcement option now click F7 key on your computer to select that option.
- Now wait until the computer gets restarted, and then you are ready to go install unsigned drivers on your computer.
Solution 2:
You can also use command prompt or cmd to disable digital signature enforcement on your computer permanently.
- Now open Command prompt as Admin or you can say run command prompt as Administrator.
- Now type these command on command prompt:
bcdedit.exe /set nointegritychecks on and hit Enter key.
- Now, your digital signature enforcement has been disabled permanently.
In case if you are wondering how to enable the digital signature enforcement again follow these steps.
- Open Command prompt as Administrator.
- Type these command on your command prompt:
bcdedit.exe /set nointegritychecks off and hit Enter key.
- Your digital signature enforcement has been successfully enabled.
Thanks for reading this post.


Comments
Post a Comment